
In Metro ERP, this process involves connecting to your bank to automatically import bank statements into the system. Here’s a step-by-step guide to help you sync or fetch statement lines in bank statements:
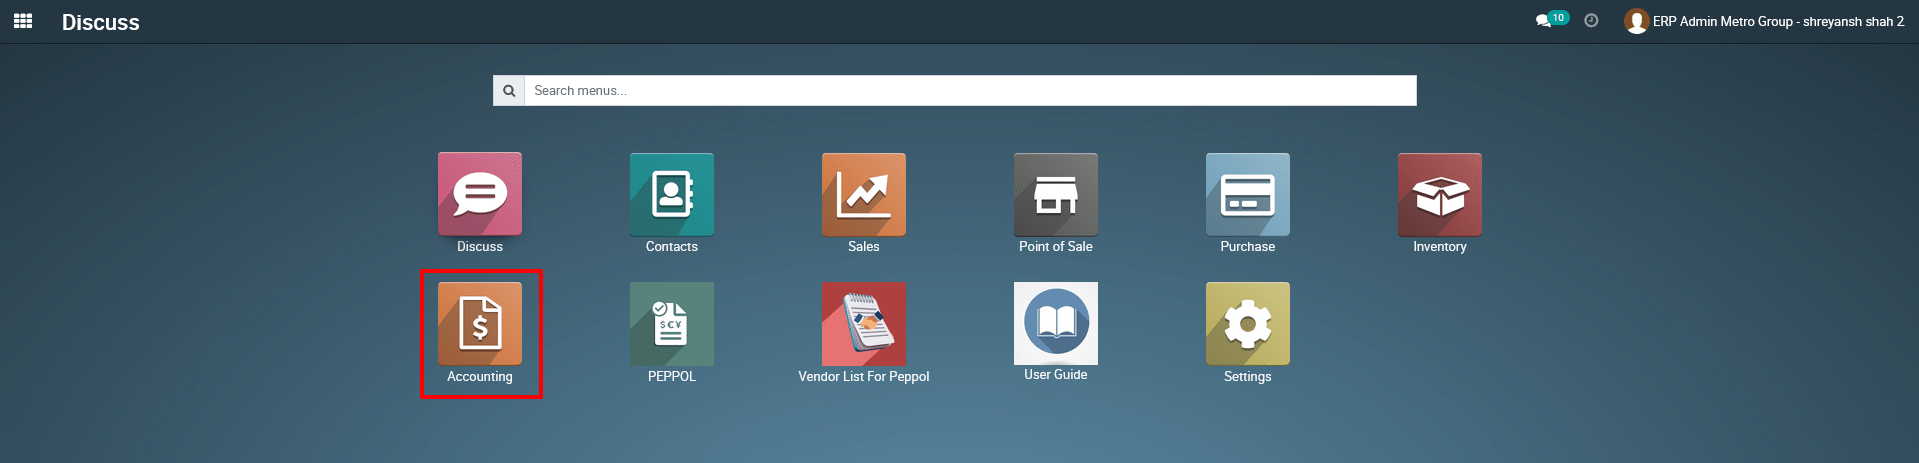
1) Go to the Accounting Module. By Clicking on the ‘Accounting’ application.
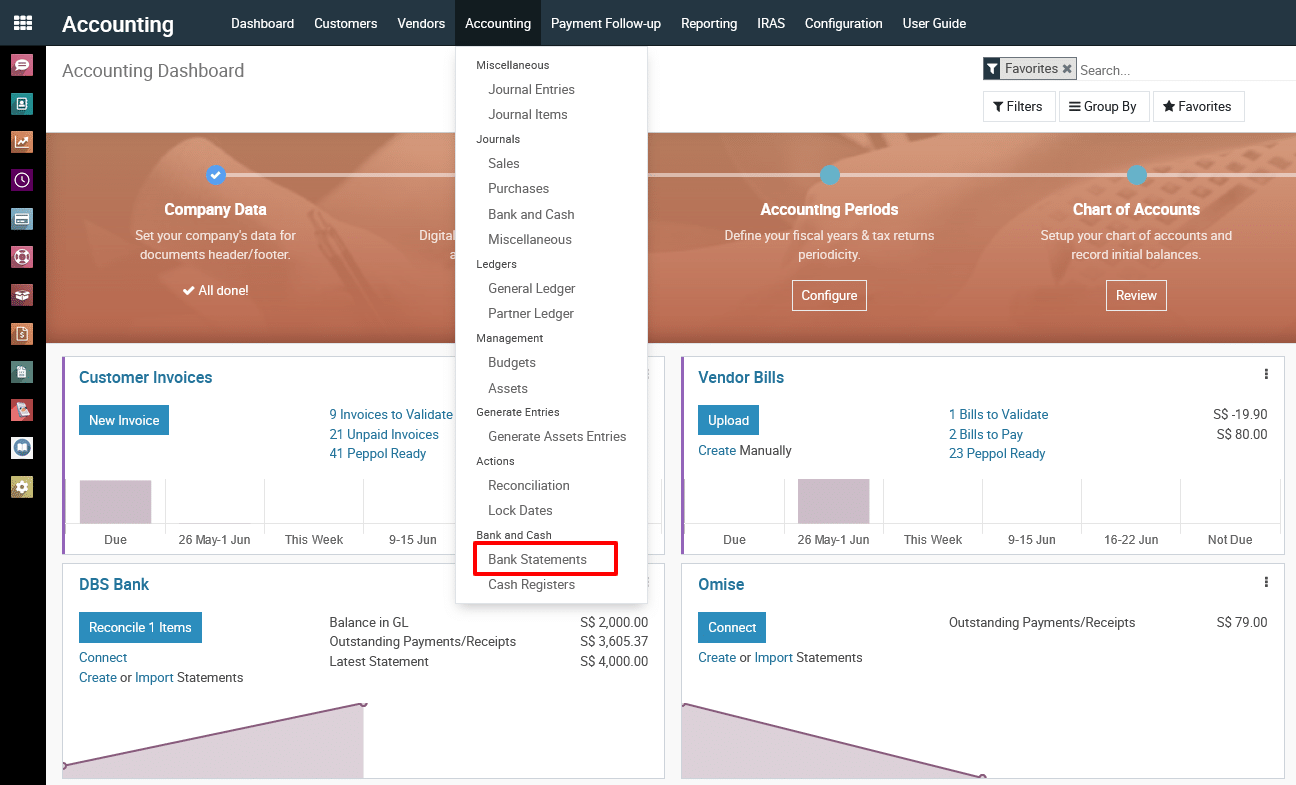
2) Navigate to the Accounting > Bank Statements menu.
3) Click on the create button.
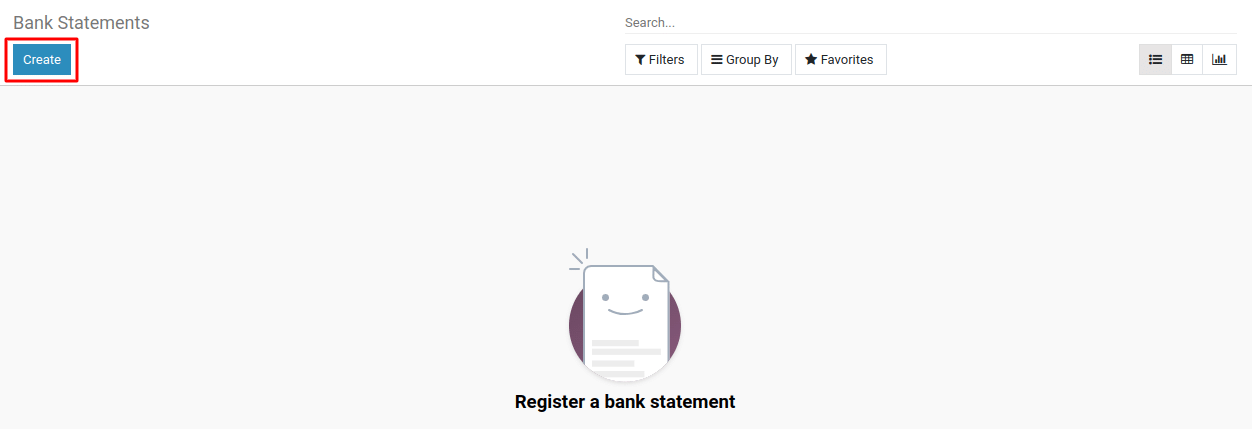
4) Create a New Bank Statement:
- Click on the Create button to create a new bank statement.
- Fill in the necessary details such as the Journal (bank account), date, and starting balance.
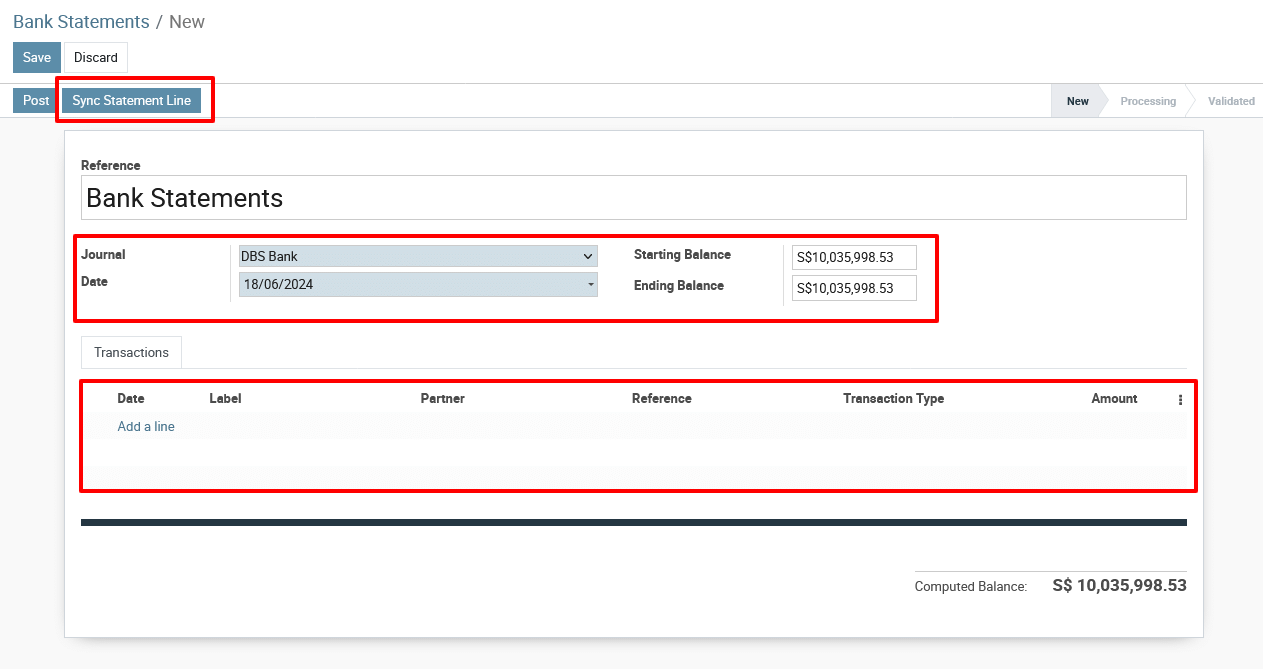
5) Sync Statement Line:
- After filling out the initial details, click on the Sync Statement Line button.
- Metro ERP will connect to your bank and fetch the latest transactions automatically.
Once all the required fields are filled out, click the Save button.
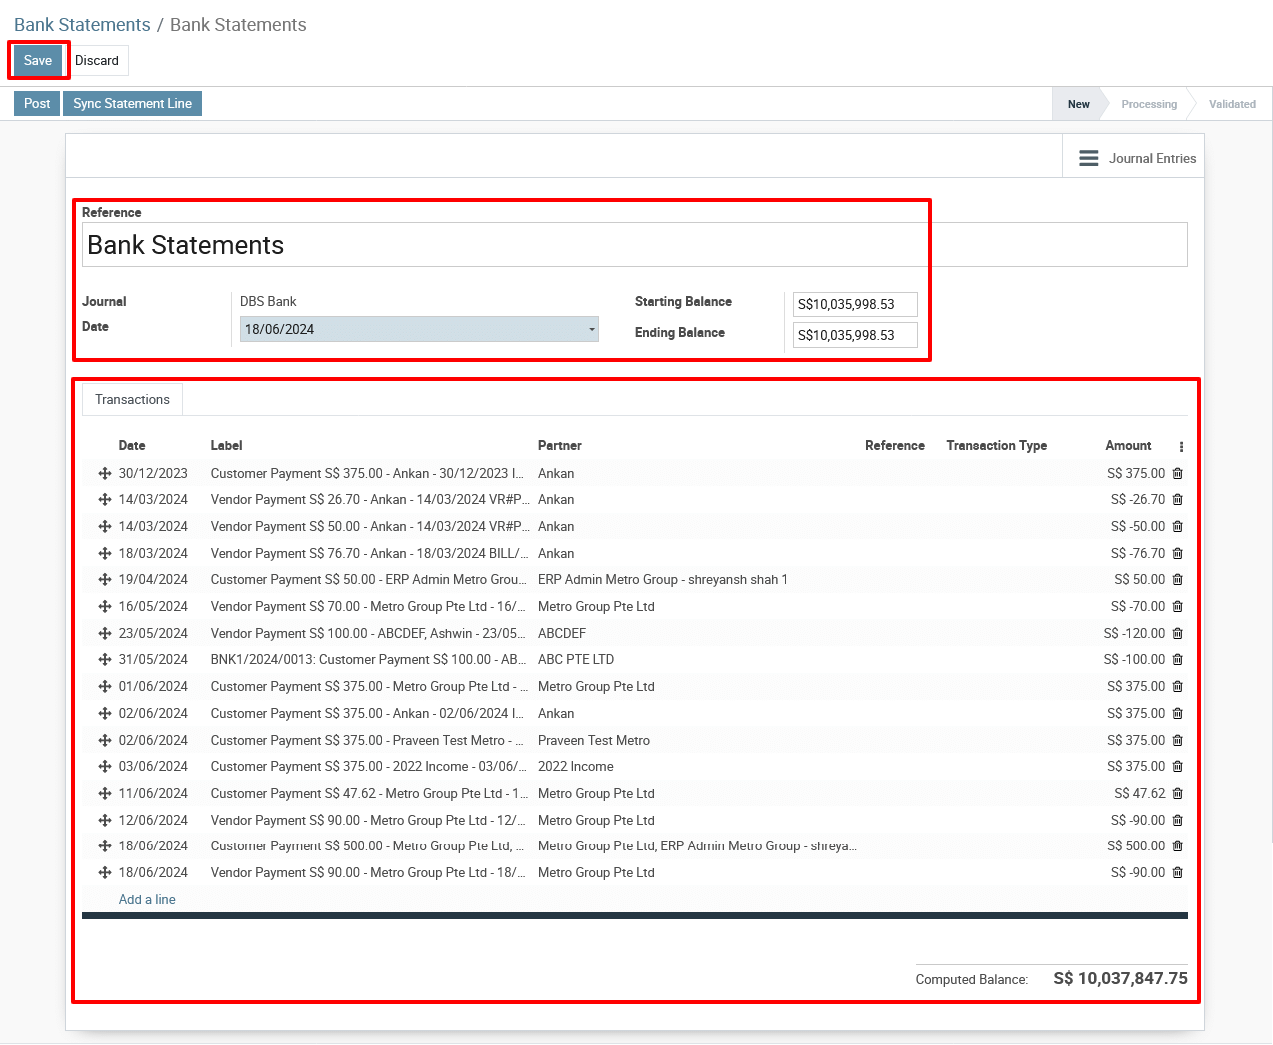
6) Transactions Section:
- Add a line: This allows the user to add individual transaction lines to the bank statement.
- Columns:
- Date: The date of the transaction.
- Label: A description or label for the transaction.
- Partner: The partner associated with the transaction.
- Reference: Any reference number for the transaction.
- Transaction Type: The type of transaction (e.g., payment, receipt).
- Amount: The amount of the transaction.
7) Reconcile Positive and Negative Entries
- For positive entries (deposits/credits), match them with the appropriate invoices.
- For negative entries (withdrawals/debits), match them with vendor bills.
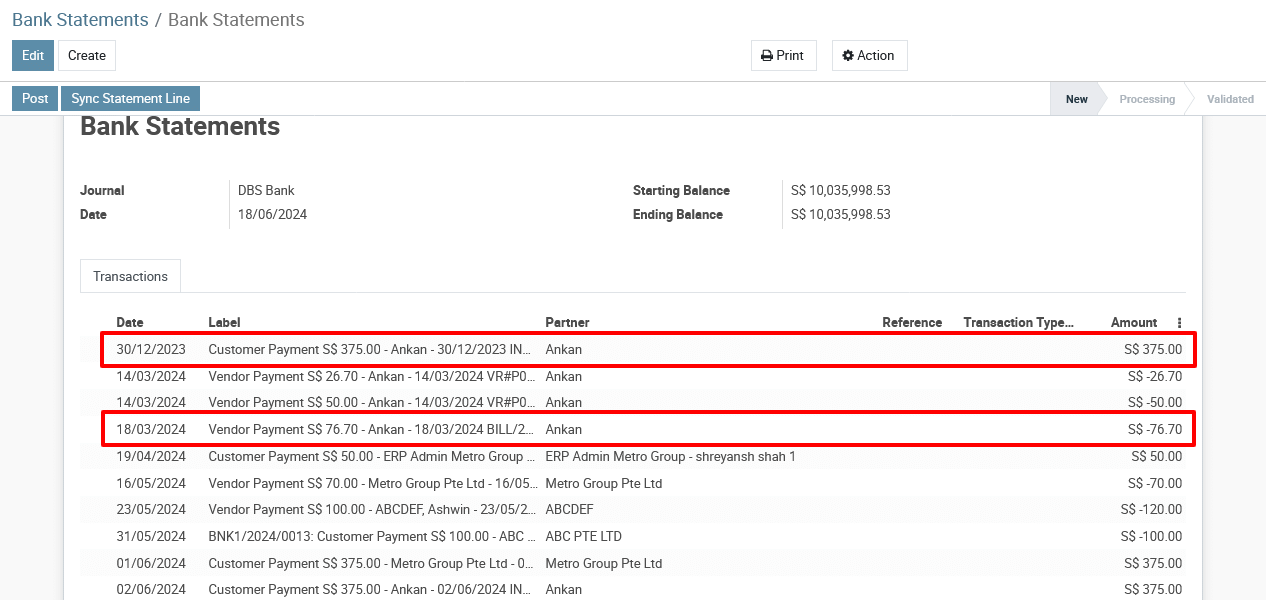
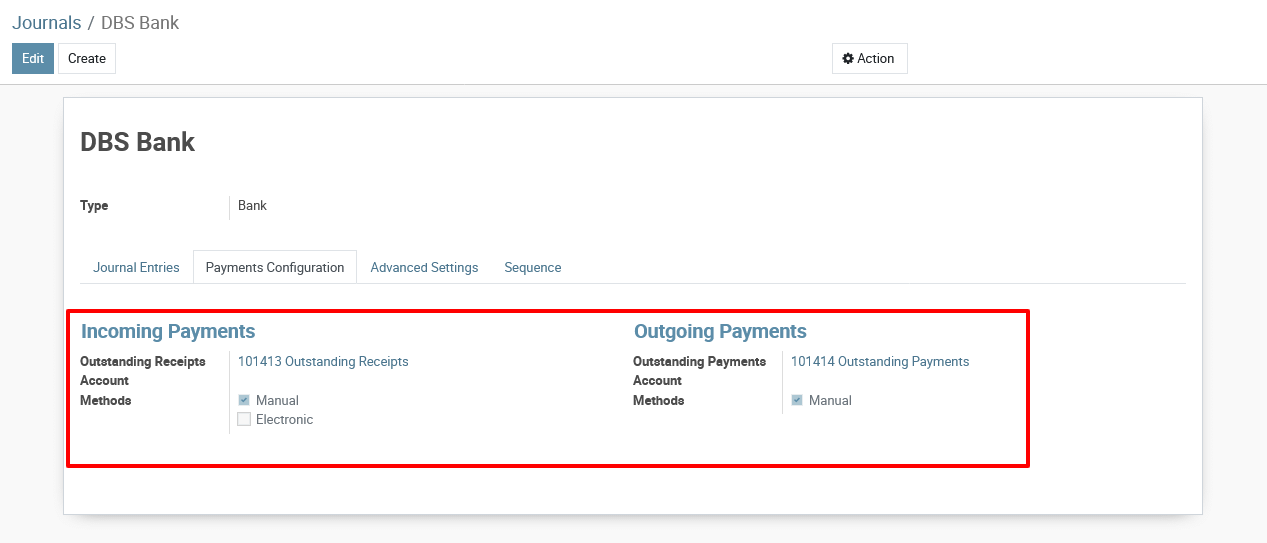
8) Set a specific account for the incoming and Outgoing payments
- Incoming Payments Account: 101413 Outstanding Receipts
- Outstanding Payments Account: 101414 Outstanding Payments
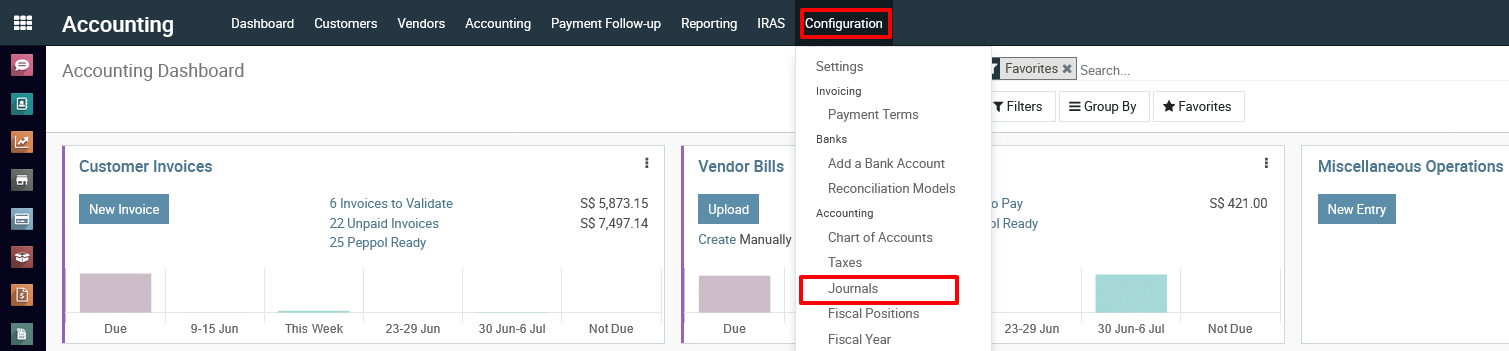
Navigate to the Accounting > Configuration >
Journals
menu.
To get more details on how to sync or fetch bank statements in Metro ERP?, please do contact us at support@metrogroup.solutions