
To
streamline the process of importing contacts in bulk into the Metro ERP system,
follow these step-by-step instructions:
Step 1: Prepare Your Excel or CSV
File
Ensure your
Excel or CSV files are well-organized and contain all the necessary information for
each contact. Include columns for details such as contact name, email address,
phone number, company, and any other pertinent information.
For
example:

Step 2: Access the Import
Functionality
Log in to
the Metro ERP system using your credentials.
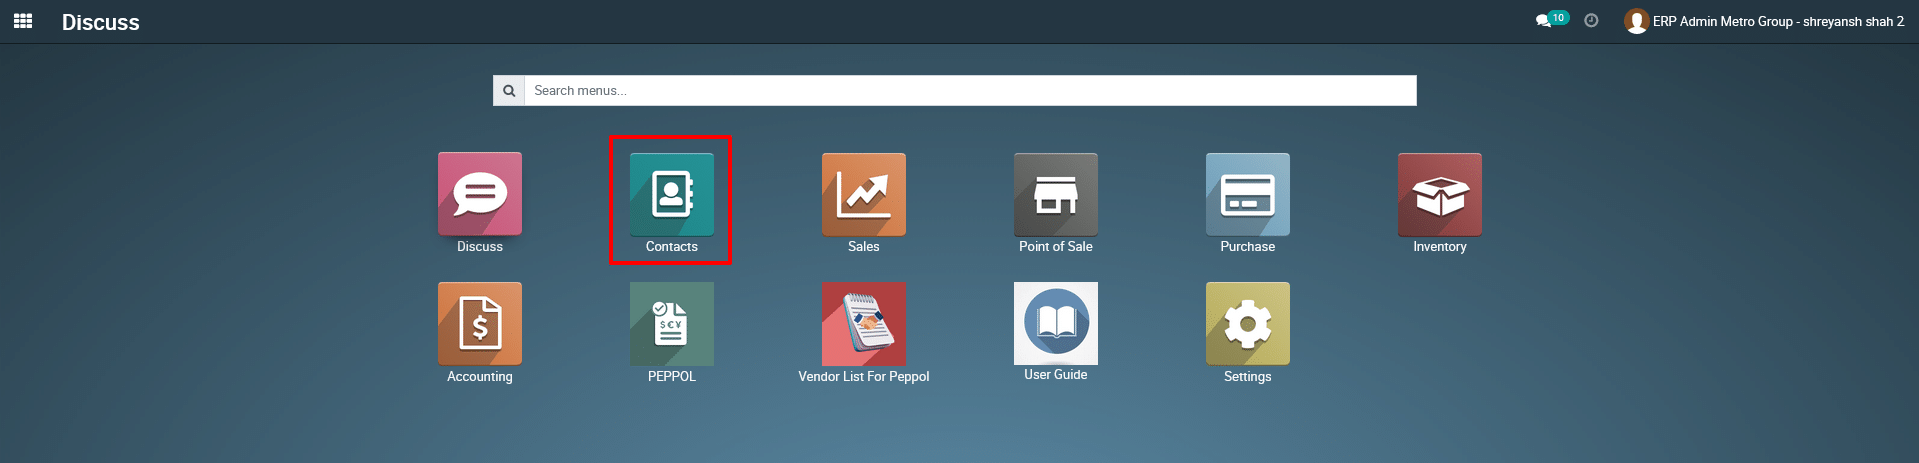
Navigate to
the ‘Contacts’ section.
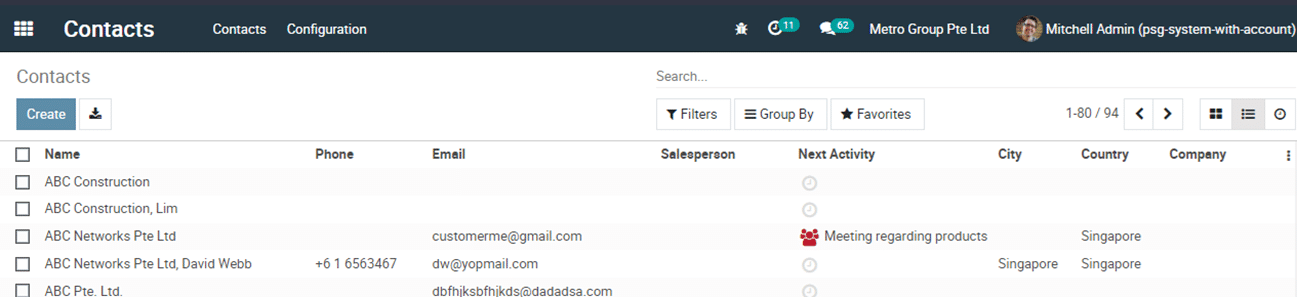
This is a
preview of the ‘Contact’ page.
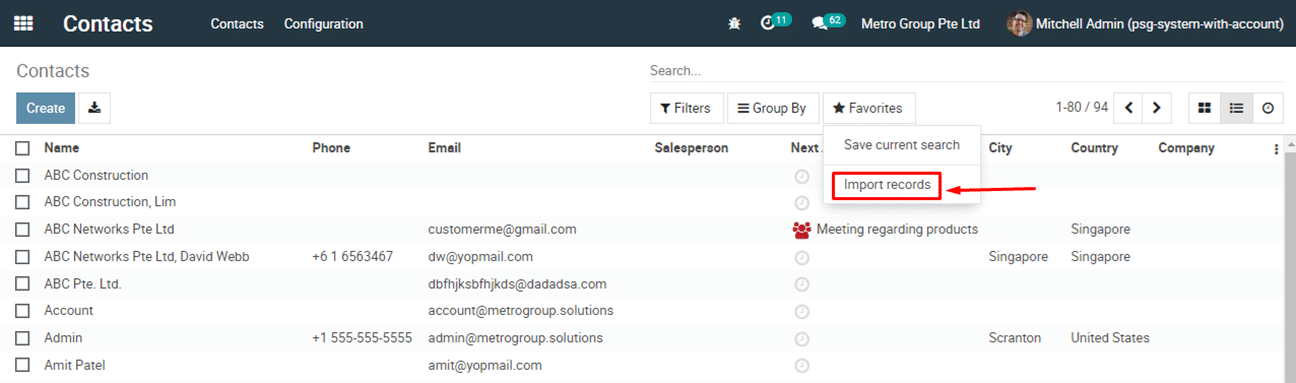
Locate
‘Favorites’ and click on the ‘Import Records’ option.
Step 3: Choose File and Mapping
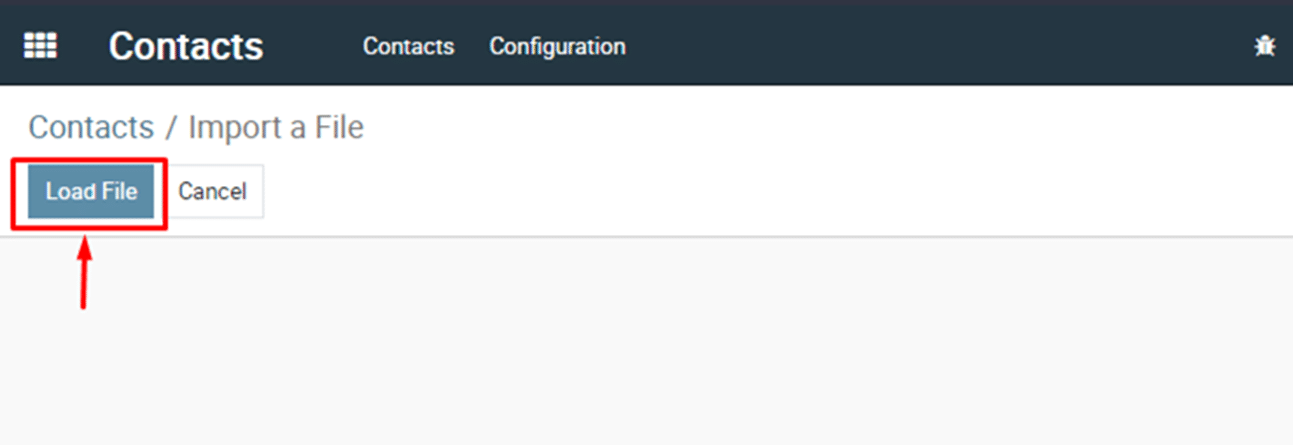
Click on
the ‘Load File’ option and select the Excel or CSV file you prepared in Step 1.
The system
will prompt you to map the columns from your file to the corresponding fields
in the ERP system.
Preview the data to be
imported and verify that all information is accurate.
Click on ‘Test’ to check
whether the data mapping is correct or if there is any issue.
If necessary, make
adjustments or corrections.
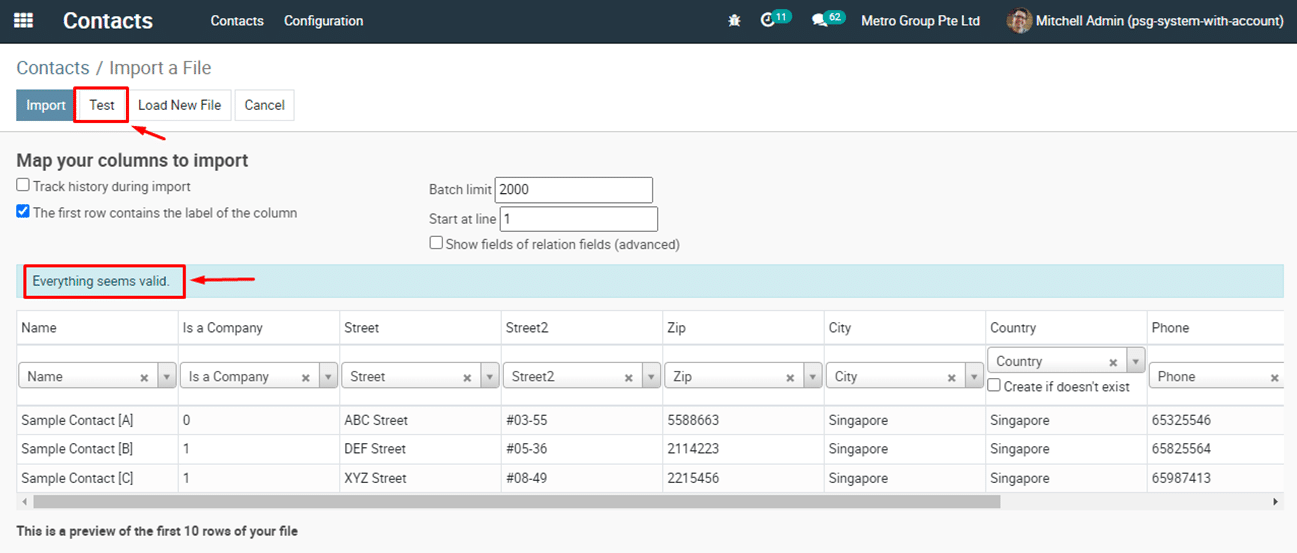
If
everything is correct, and the message ‘Everything seems valid’ will be displayed
as shown in the screenshot below.
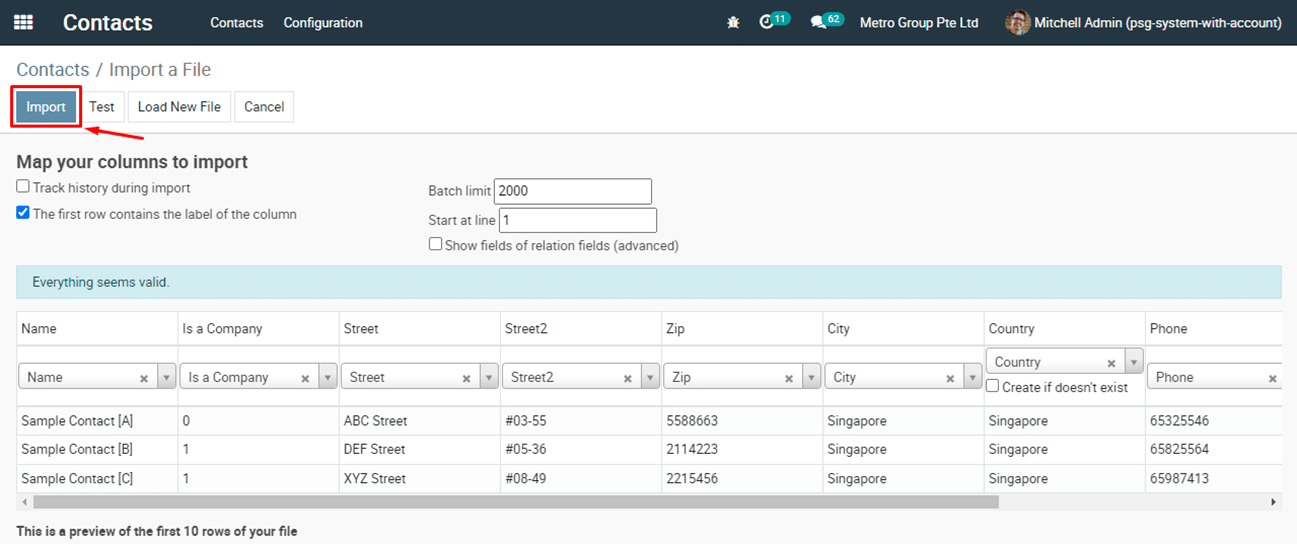
Click on
‘Import’ to start importing process.
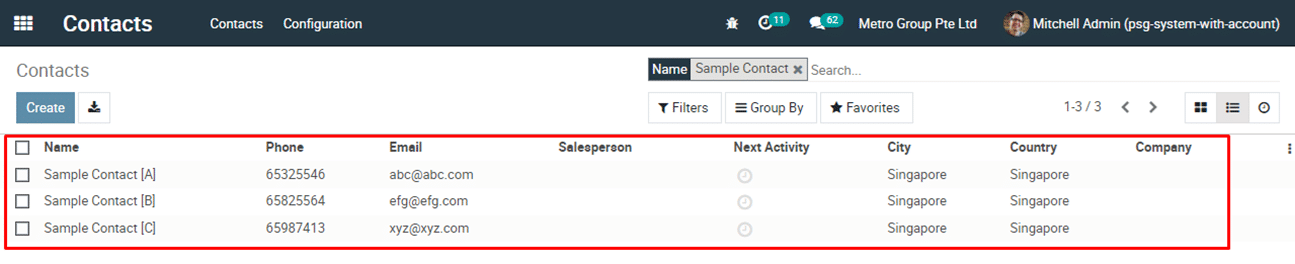
Check if
your contacts have been successfully imported.
Step 4: Post-Import
Verification
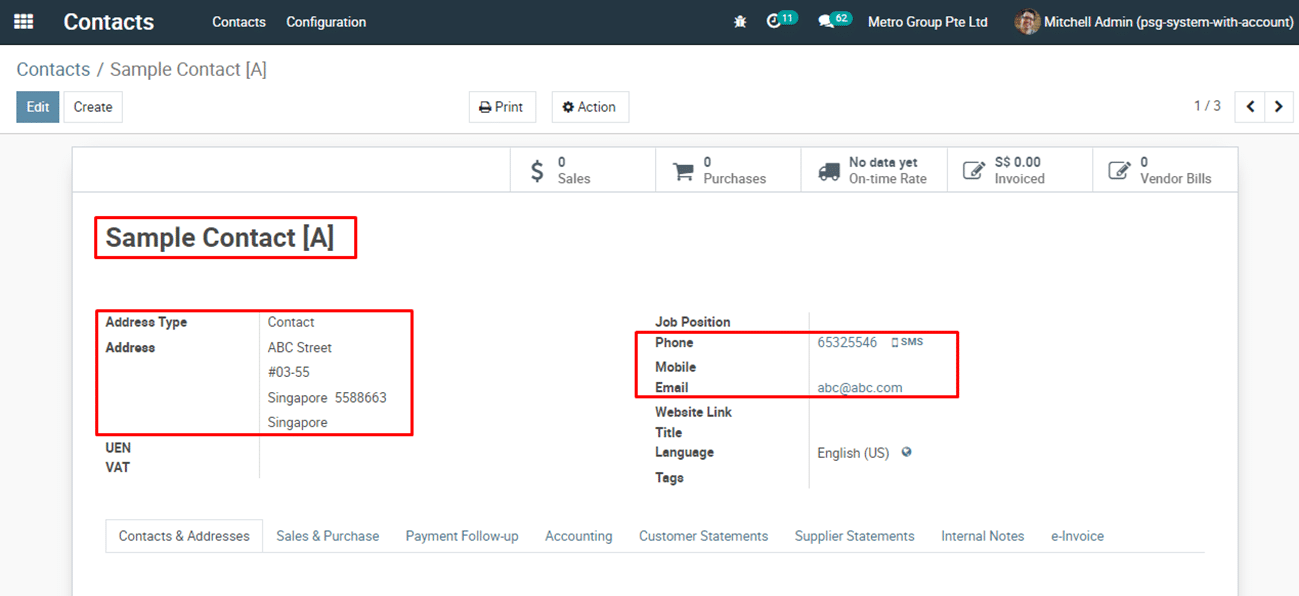
After the
import process is complete, cross-verify a sample of imported contacts to
ensure accuracy.
Congratulations! You have successfully imported contacts in bulk
quantities into the Metro ERP system using an Excel or CSV file.
To get more details on how Metro ERP works with mobile responsiveness, please do contact us at support@metrogroup.solutions