
Quick Guide for Navigating the Metro ERP’s Accounting System
1) Access the URL
Open a web browser and enter the URL where your instance is hosted. This URL is usually provided by your organization or the administrator of the system.
2) Reach the login page
Once you enter the URL, you should be directed to the login page. This is where you will enter your credentials to access the system.
3) Enter your credential
On the login page, you will typically find two fields:
• Username or Email: Enter the username or email address associated with your account.
• Password: Enter the password associated with your account.
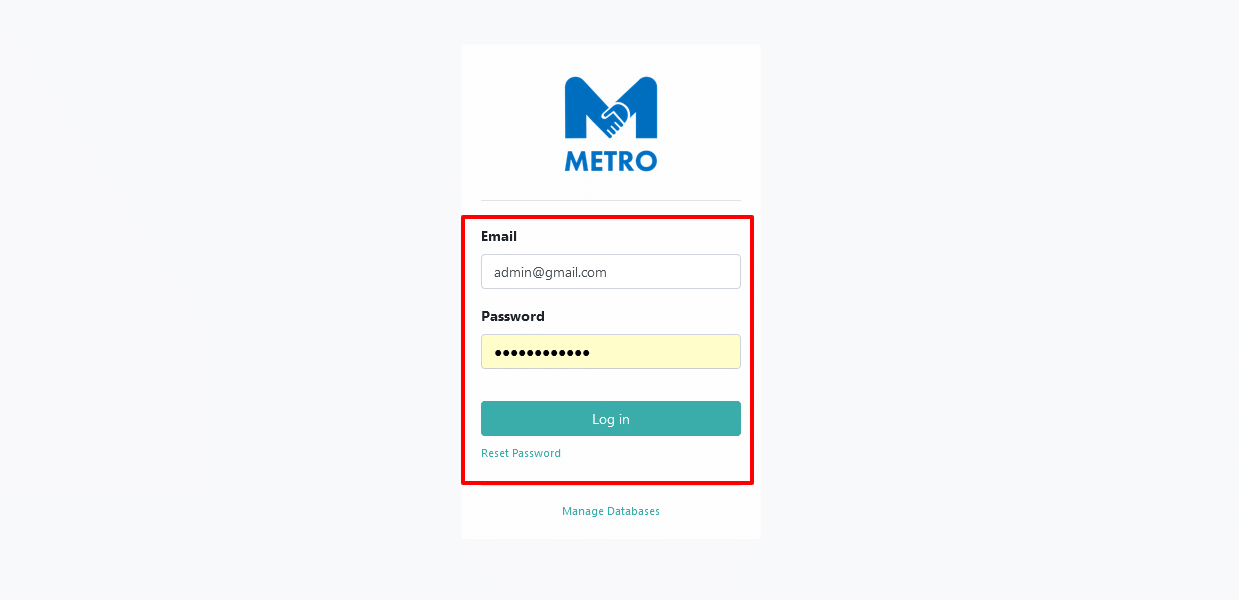
4) Click the Login Button
After entering your credentials, click “Login” or “Sign In” button. This will initiate the login process.
5) Authenticate and Access
If your credentials are correct, you will be authenticated, and you will be granted access to the system. You will be directed to the default dashboard or the module you have permission to access.
Click on the menu icon at the top left corner to be redirected to the main dashboard page.
Apps Menu: Access all available modules.
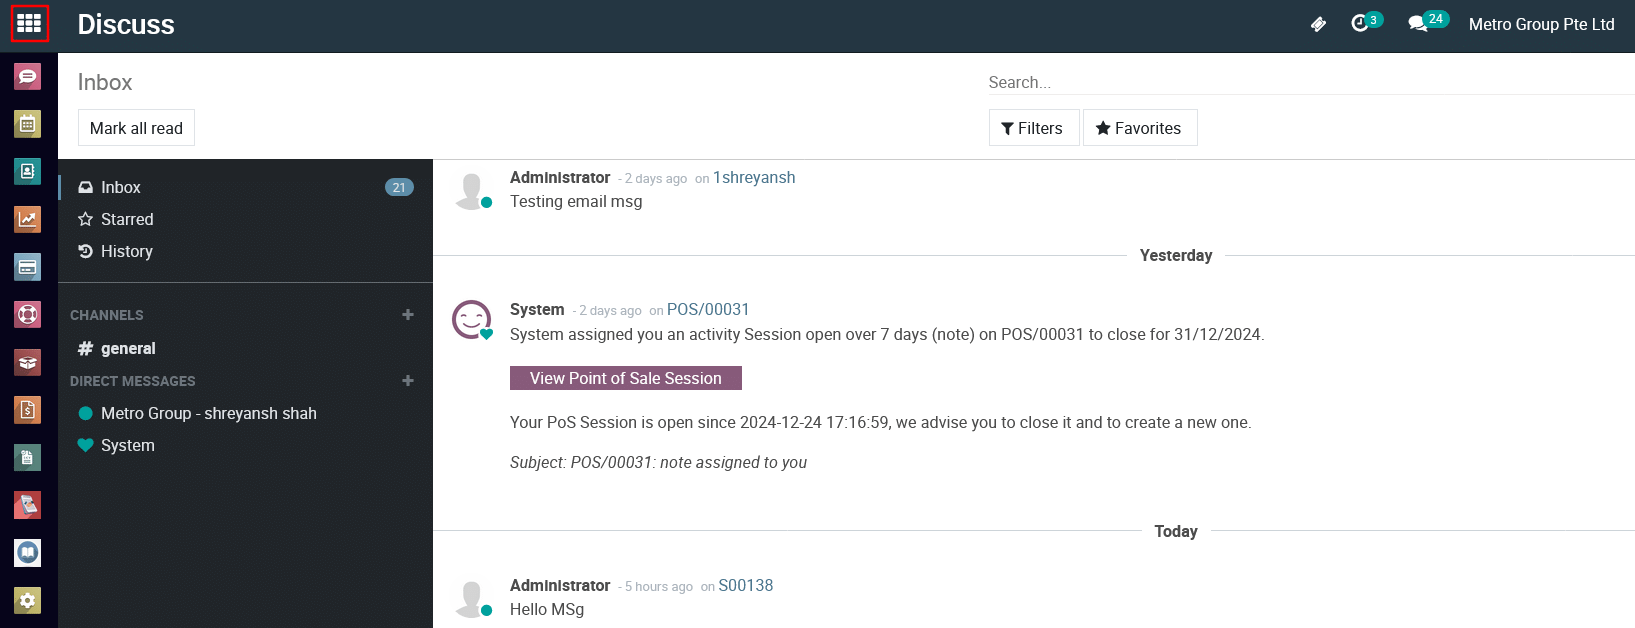
Dashboard Overview:
Metro ERP is an integrated suite of business applications designed to streamline operations and enhance productivity. This guide provides an overview of navigating its interface and key features.
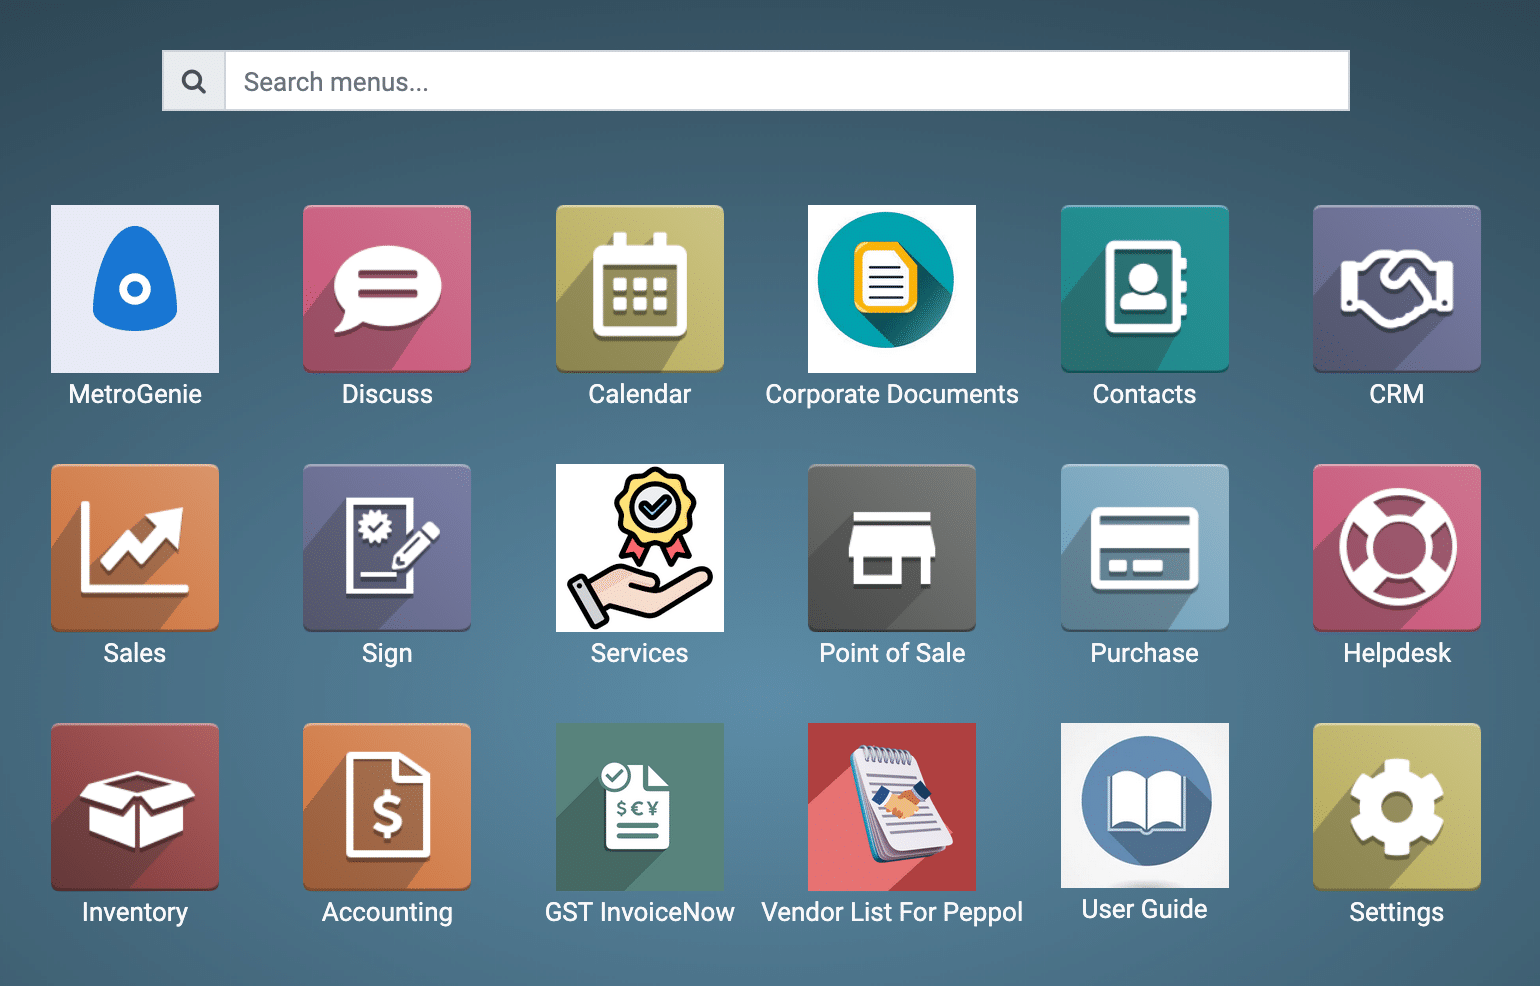
App Icons:
The icons represent various modules or applications within Metro ERP. These modules are designed to handle different business functions. Here’s a breakdown of the icons visible in the screenshot:

MetroGenie
Redirects to the MetroGenie Dashboard to A smart tool to manage and automate metro-related operations efficiently.

Discuss
Redirects to the Discuss Dashboard, designed for internal communication with features like chat, forums, and document sharing.

Calendar
Redirects to the Calendar Dashboard to manage schedules and events.

Corporate Documents
Redirects to the Corporate Documents Dashboard to Centralized system to create, manage, and track official documents.

Contacts
Redirects to the Contacts Dashboard to Store and organize all customer and business contact details.

CRM
Redirects to the CRM Dashboard, designed for Manage leads, opportunities, and customer relationships effectively.

Sales
Redirects to the Sales Dashboard, handling the entire sales process, including creating quotations, sales orders, invoiciing.

Sign
Redirects to the Sign Dashboard to Digitally sign and manage documents securely online.

Services
Redirects to the Services Dashboard to Track and manage service operations and customer support tasks.

Point Of Sales
Redirects to the Point Of Sale Dashboard to Fast and user-friendly billing system for retail transactions.

Purchase
Redirects to the Purchase Dashboard to manage procurement, purchase orders, and vendor relations.

Helpdesk
Redirects to theHelpdesk Dashboard to manage support tickets and inquiries.

Inventory
Redirects to the Inventory Dashboard to track stock, manage products, and oversee warehouse operations.

Accouting
Redirects to the Accounting Dashboard, handling financial transactions, including invoicing, payments, and financial reporting.

GST InvoiceNow
Redirects to the GST InvoiceNow Dashboard to Generate and manage GST-compliant invoices easily.

Vendor List For Peppol
Redirects to the Vendor List For Peppol Dashboard to Access and manage vendors registered on the Peppol network.

User Guide
Redirects to the User Guide Dashboard for Metro ERP documentation.

Settings
Redirects to the Settings Dashboard to customize Metro ERP features and settings.
To get more details on A Quick Guide – Navigating Metro ERP’s Accounting System, please do contact us at support@metrogroup.solutions